Making a chess set based on Persepolis Reliefs with AI
- Ardi Alemi
- Apr 1
- 4 min read
From Persepolis to Chess Pieces

Part one: The Idea
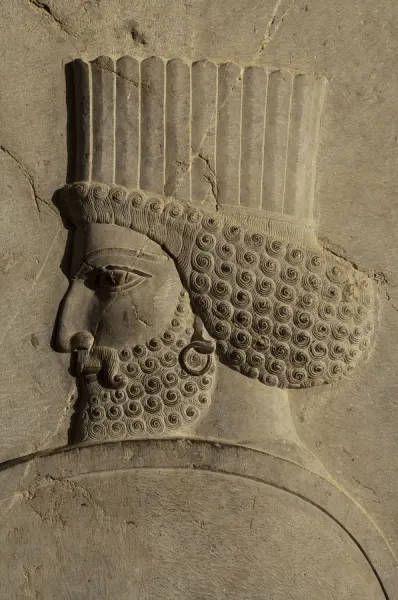
I always wanted to make a chess set based on the reliefs in Persepolis. But I was never a good sculptor. At least not until now.
To achieve this goal, I had two main problems.
First, I couldn’t see them in full form. These reliefs are flat, but they don’t feel flat. There is volume in them, but it’s hidden.
I couldn’t clearly imagine what they look like from the side.
The second problem was more practical.
How do you actually make them?
Do I design the pieces and carve them out of wood? Do I sculpt them in clay?
I tried a few materials. Small tests.
It didn’t take long to realise the truth.
I’m not that good a sculptor.
Not at that level.
These carvings are over 2500 years old. And they are still better than anything I could make by hand.
Every fold is controlled. Every line has purpose. Nothing feels random.
You can’t fake that.
Part Two: The Approach
I went back to what I already knew. How would I do this in a 3D application?
The answer was clear. I would need orthographic views.

Front. Side. Back.
Without that, nothing works. So I started collecting images.
I looked for reliefs that could match each chess piece. Figures with clear posture. Clear silhouette. Something that could translate.
Then I used AI.
To imagine the missing views. What does this figure look like from the side? What would the back look like? And more importantly, can all three views match? That became the rule. Once the views aligned, the piece started to feel real. The next step was proportion. This is not just a sculpture. It’s a chess set. Each piece has a known height and presence.
So I adjusted everything to match a standard set. King is the tallest, pawn is the shortest and clear steps between each piece
Now they started to relate to each other.

Then I needed a base. I didn’t want something generic. So I used the columns from Persepolis. Simple. Solid. Recognisable. I built a base from that language and kept it consistent across all pieces. Once that was ready, I combined everything. Each figure was placed on its base. Scaled correctly. Centred properly. Then I exported them as clean images. One piece at a time. Now they were not just references anymore. They were structured. And ready for the next stage.
Part Three: The Shortcut
Now I had the images, and for the first time, the pieces felt structured rather than imagined.
The views matched, the proportions made sense, and each piece already had a clear presence within the set. The next step was obvious.
I needed to turn them into 3D models.
But I also knew that modelling each piece by hand would take a long time, especially with this level of detail, and I wasn’t interested in spending weeks sculpting something that I had already struggled with earlier.
So, being honest with myself, I started looking for a shortcut.
I began thinking about it in reverse.

Photogrammetry usually takes many photos of a real object and rebuilds it in 3D, but I wondered if the same idea could work the other way around, using structured images to generate the object instead of capturing it.
That led me to a range of tools that are built for exactly this purpose.
There were quite a few options, and at first, I didn’t spend much time comparing them properly.
I just picked the first one I found and tried it.
That didn’t go well.
What I quickly realised is that not all of these tools behave the same way.

Some of them produce something that looks acceptable at first glance, but once you inspect the mesh, the problems become obvious, and you end up repeating the process again and again, hoping for a better result each time. That gets expensive and frustrating very quickly. Eventually, I found Meshy, and this was the first tool that gave me consistent results without that trial-and-error loop.
It wasn’t perfect, but it was reliable enough that most pieces came together in one or two attempts, which made the whole process feel practical instead of experimental.
That was the turning point.
At that stage, I had something I didn’t have before.
A full set of chess pieces, still based on the Persepolis reliefs, but now existing as real 3D forms rather than flat interpretations.
They still needed cleaning and refinement, but the hardest part was done.
Part Four: From Digital to Physical
For the last stage, I used my Creality Ender 3 V3 SE and started printing the pieces.
This is where things got real.
Up to this point, everything was controlled. Images, proportions, models, all clean
and predictable.
Printing is different.
Very quickly, I realised how much I didn’t know.
There is a lot to learn.
Print quality, filament types, layer settings, wall thickness, and structural strength. All of it matters.
Some pieces looked fine on screen but failed in print. Others printed, but were too fragile. Some lost detail. Some warped.
So I kept going.
I printed full sets.

And threw them away.
Three or four complete sets, just gone.
Each one taught me something:
where the weak points were
how thick things needed to be
What details survive at the small scale
Slowly, it started to come together.
The forms became stronger. The details held up better. The set started to feel consistent in the hand, not just on screen.
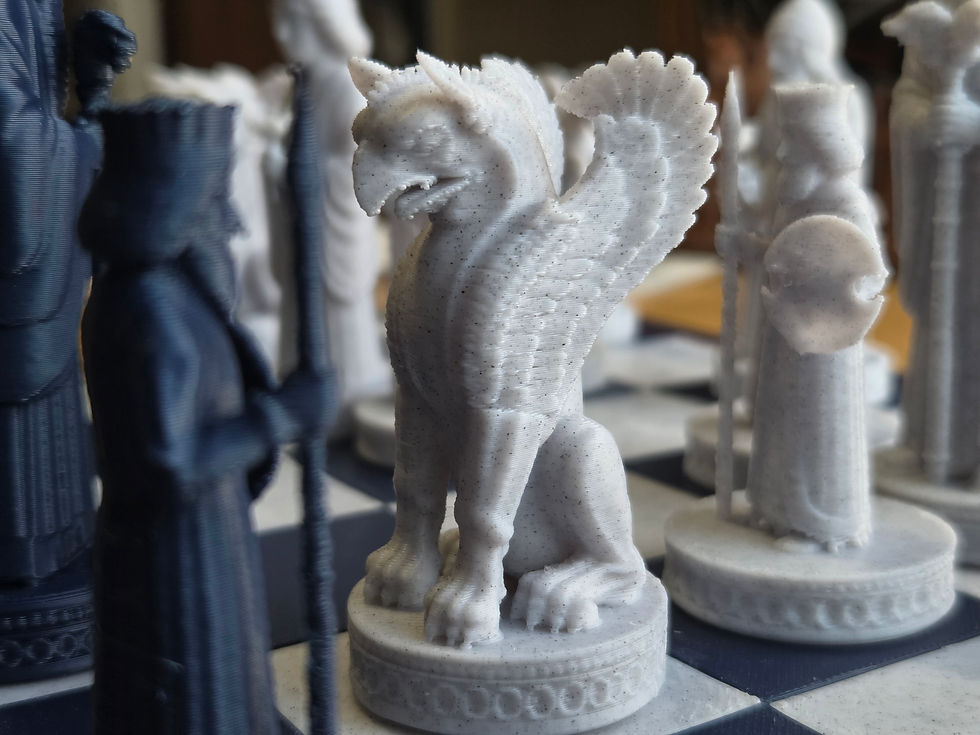
In the end, I had something I didn’t have before.
A full chess set.
Designed from 2500-year-old reliefs,built through AI,and brought into the real world through printing.


This wasn’t about avoiding the work.
It was about moving the work.

AI helped with:
imagining the missing views
building the base 3D models
preparing files for print
But the decisions, the adjustments, and the final result still came from the process.
Now I have a chess set that never existed before.
But feels like it could have.
Comments